
No our Poppyseed is not demoing...yet. Instead I found my ‘nesting’ instincts revolve more around a sledge. As we previewed before, I decided that when wifey is away I should ‘check’ to see how difficult the tile would be to replace in the second floor bathroom.
 |
| “It’s pretty much ridiculous. I think you could set off a nuclear bomb in here and be fine.” |
Yep, we knew this house has good bones, but sometimes they REALLY overbuilt. Case in point, our bathroom tile is individually, hand-placed ceramic tile, over 1 WHOLE INCH of wire-reinforced concrete.
With the help of a shiny new prybar and an arsenal of tools, I went at it. After five hours of demo, only ⅓ was completed...Boo. This stuff was insane to demo and was remarkably well made. The chief cause of frustration was that wire mesh. It looks like chicken-wire, but I assure you, that it's at least 2-3 times as thick. The traditional technique of breaking up the tile and then lifting it off the floor in large sections just didn't work because of that wire mesh. Instead, the mesh meant that I had to resort to a tedious technique.
First, break up the ceramic tile and leave the cement exposed. Next, using a shiny new pry bar, lift up a foot of concrete at a time from the sub-floor. This will then proceed to drag all of the rest of the floor with it because of that darn wire mesh. Then pry up around the target area a few more times, which loosened the cement from the floor. And now for the really un-fun part, take the 4 lb sledge and break out the concrete pieces from each hole of the wire mesh. This took FOREVER to do.

Once you have a mound of rubble, scoop it all up and haul it to the garage. Rinse and repeat.
Now, after that first foray, I was about as sore as you can imagine. We also had a gazillion family/friend activities and weddings to attend, so that poor bathroom sat ⅓ demolished for longer than I care to admit. Sorry, Emily!

Before the next demo party, it was time to take out the toilet. Of course nothing is ever easy, and the shutoff valve needed to be replaced. Back to Lowes! This time I was smart and picked up shut-off valves for all of the remaining toilets in the house. If two were bad, then we can be assured that other ones should be replaced, too.
Anyhoo, once the water was shut-off, we inexpertly drained the tank, managing to splash a fair amount of the tank water on the floor, OOPS.
Hint, this is epic foreshadowing for our next post….
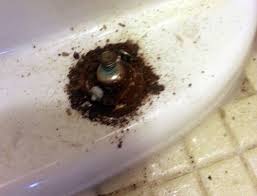
Anyways, I removed the toilet tank, and then proceeded to try and remove the bowl. Nothing is ever easy.The original installers had saved 10 whole cents and used zinc plated bolts instead of the nominally more expensive brass. The problem with zinc? It eventually corrodes and our house is 30 years old. We now faced a completely rusted-out bolt and nut that needed to be hack-sawed off. Double grumble.

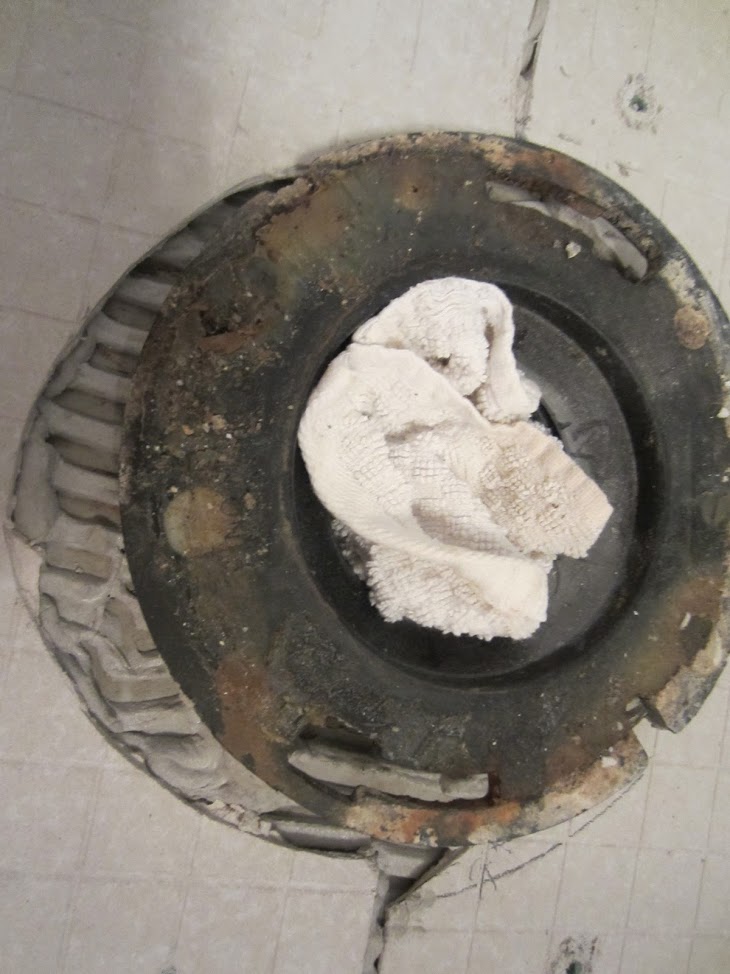
Eventually we removed the bowl and cleaned up the toilet flange. Learning from the many other DIY bloggers, we stuffed an old rag down the waste pipe.This stops any sewer gasses from drifting back into the house and also prevents any debris from getting in the stack.
I then SLOWLY proceeded to demo the rest of the bathroom. All said and done this ‘little’ bathroom managed to suck up a solid week and a half just for demo. The subfloor is in fantastic shape for a 30 year old home. The only real worry is this spot next to the tub.
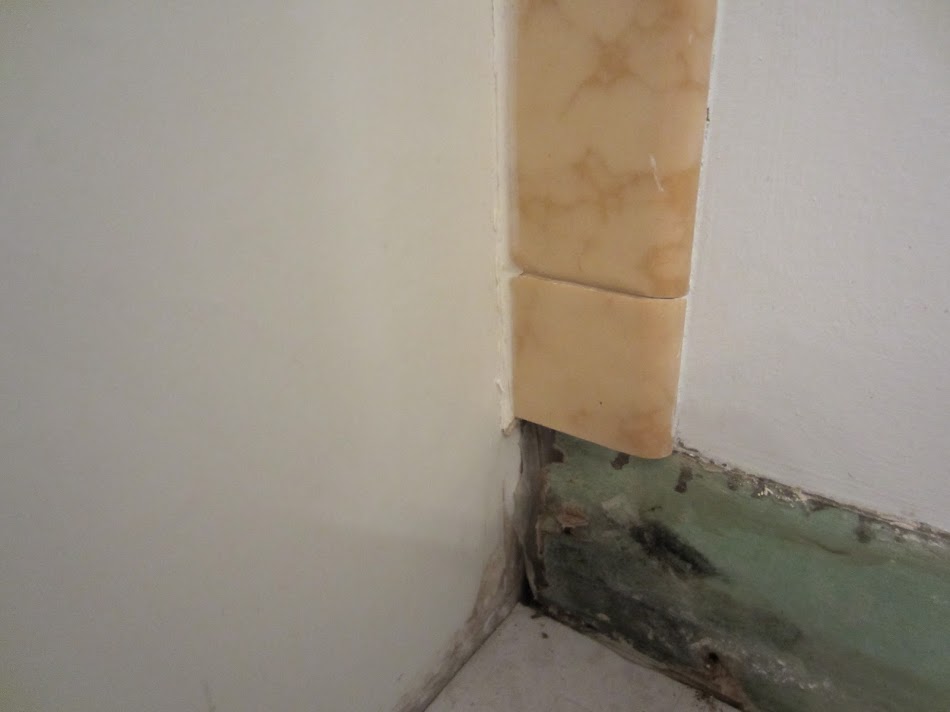
While there are signs of surface rot, we tested it and the area is still sound. We are going to seal it up and the new thinset should protect things nicely for another 30 years.
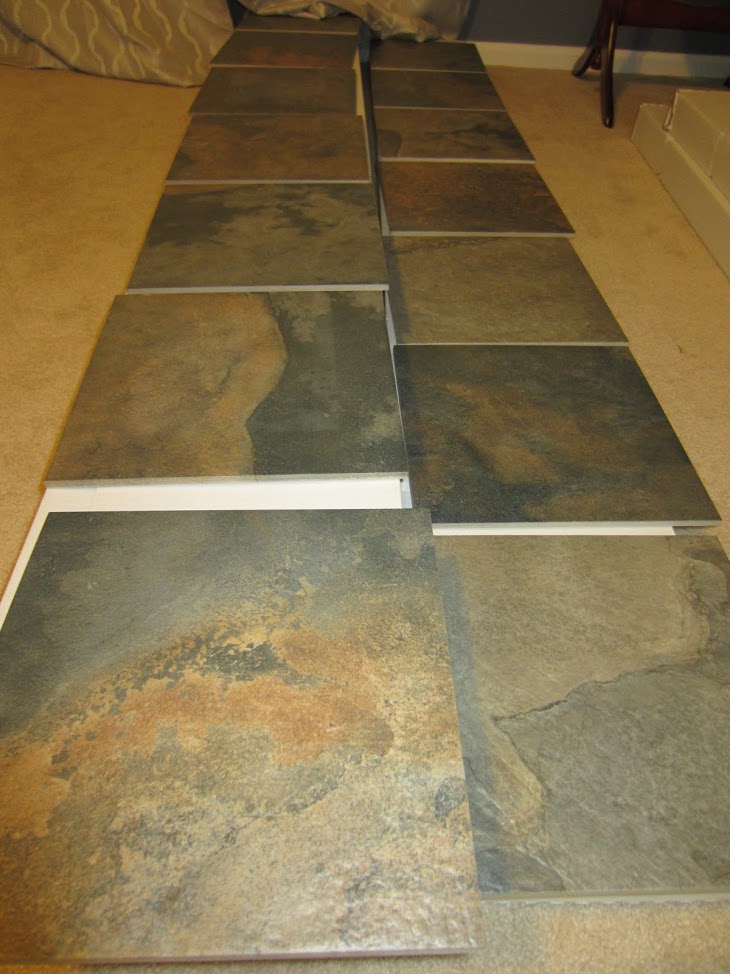
So what's next? Here is a preview of the tile that we purchased from our awesome haul. Depending on how dark it looks overall, we might paint the vanity. Then, I’ll need to put down thinset and cement board to level out the floor. Finally, we’ll get to install the tile.
No comments:
Post a Comment
What do you think?