Pages

Showing posts with label wallpaper. Show all posts

Tuesday, February 4, 2014

the secret to taking down wallpaper

Need to tear down wallpaper? Well, you're in luck, because we discovered the secret!

Host a Super Bowl party, serve some drinks and chili, and let the boys loose! Before you know it, there's a pile of shredded wallpaper in the hall and some men feeling darned proud of themselves. Destruction that makes the wives happy.

Mike and I aren't exactly NFL fans and couldn't care less about the Super Bowl, but it was a great excuse to invite a bunch of people over and test out the house's hosting capabilities. We spent a good portion of the morning trying to reconfigure the living room to maximize the space, because trust us--it filled up fast with our couches!

The funny thing is that hardly anyone spent time in there! Everyone gathered in the kitchen, except for one rug rat who spent most of his evening zooming around like a race car and then sliding giddily across the hardwood. Of course, some of the inattention to the TV could just be avoiding the pain of watching the Broncos fail beyond all reason.

It was awesome to have friends and family in the house, and the kitchen seems well suited for it. Toward the end of the evening as we were trying to nudge people out the door, Mike and two of his buds randomly decide to take on the main floor bath. We'd joked before about a house rule: every time you use that toilet, you've got to take a swipe at the wallpaper.

What's the cliche? Go big or go home!


Saturday, January 4, 2014

Wallpaper Strikes Back!

Well.

The day started with the grand plan of finishing off the master bedroom and hopefully caulking and/or priming the master bath.

We got rolling:
Olympic's Cozy Corner - Less purply in real life. We loooove this color.

We paused before doing the fourth wall (the bed wall), because we were going to do an accent wall in Admiralty, a navy blue, but as will be discussed in a later post, we eventually decided against it. But we needed to let the swatch (around Mike's head in the photo) dry before priming over to continue on with the wall.

So, we decided to get going on the shower room, which had been stripped of its wallpaper all the way down to the wallboard.

Or so we thought.

Mike had the misfortune of delivering the bad news. There was still a layer or two (or three) of wallpaper glue. We'd let the room be for several days, and in that time, it seems the walls decided to show their true colors, or rather their scales. I probably resembled a cartoon character with steam coming out of my ears. Lucky for me, Mike took on the challenge, since he is basically a wallpaper whisperer.

With just a sponge loaded with warm soap and water, Mike gave the walls a good bath and scraped with a plastic putty knife. He could get big, long peels when he hit good spots.

Have to say, ladies. Nothin' hotter than a man conquering wallpaper glue with a smile! And, yes, that peeling stuff is all glue.


The wall is basically a schizophrenic nightmare (apologies to anyone actually suffering from the condition). Along with the basic wallboard, there are areas with paint, along with glue and wood stain (whenever there is woodwork nearby). But it's like there are 2-3 different types and/or layers of glue, like it was applied differently at different times ... but there was only one layer of wallpaper. Plus, you have the random swaths of paint. Perhaps the original builders/owners couldn't decide between beige and wallpaper? Whatever.

On the bright side, while sopping the walls, we've managed to clean some of the dirty grout on the floor tiles. We're leaving the fan running all night as a moisture precaution, since we are concerned about soaking nearly bare walls and it dripping down in the cracks between the trim and the wall. Mold, anyone? I do have a mold treatment/prevention spray that I've done around the cracked shower grout, but that won't get behind the trim. I think we are going to make sure everything is dry before we start slapping caulk and primer around.

Speaking of caulk ...

Along with wallpaper glue bringing things to a screeching halt, I had a bit of a "d'oh!" While Mike was battling glue demons, I decided to try out a little DIY trim trick on the no-longer-accent wall. Our trim is not in fantastic shape. There are gaps between the trim and the wall that paint can't fix. A favorite DIY trick is to lay painters tape in two very close rows to make a clean line to smooth caulk in the joints between the wall and trim. If you're painting trim white, this also creates a crisp, clean line to make that whole cutting in thing a lot easier.

I'd already purchased some tub and tile caulk and figured it'd work just as well on the trim. It went pretty slick. As per other DIYers, I taped off, squirted it on, and then smoothed the caulk out with a wet finger and pulled off the tape while it was still wet. It looked fantastic and was a salve to the wallpaper burn. 

As we packed up for the night, I suddenly realized all my gaps were showing again. o_0

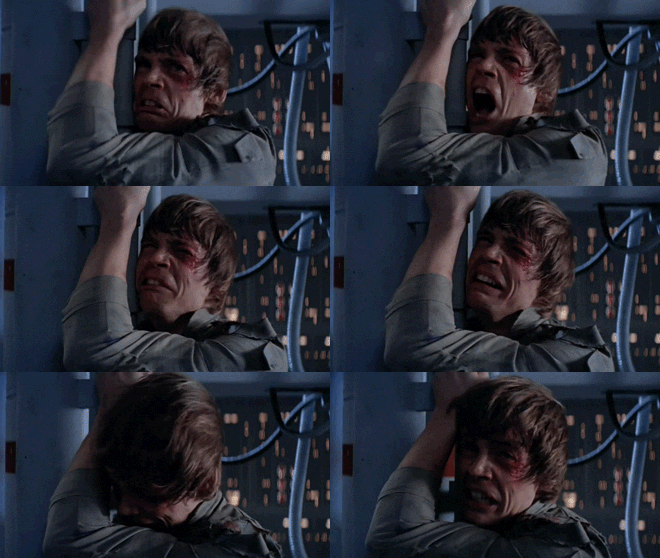
Cue Luke Skywalker screaming NOOOOOOOOOOOOOOOOOOOOO!!!


I ran my finger over my disappearing work. The caulk was there, smooth and beautiful, soaring over the offending gaps. Then it hit me.

I'd used paintable but clear drying caulk. 

Bugger.

It's not the end of the world. We're painting the trim anyway and can now paint over the gaps, but we'll need to tape again to keep that clean line. Sad but true. So, we bought some white caulk on the way back to the crash pad to use on the rest of the trim, and we can still use the clear caulk for filling in cracks in other places before painting. Not all is lost, and now we know it really does dry clear. 

So, today was definitely a setback, but we learned stuff. I guess that's how it goes. Grumble.

Wednesday, January 1, 2014

Taking down wallpaper ... Not fun, but knee surgery is worse

Wallpaper. I've heard horror stories. So, while we waited for closing day to arrive, I trawled the Internet for advice on taking down wallpaper and asked people about their own experiences. Everyone had different advice (much like the Internet), and no one had a good experience, where it just peels off. No wallpaper unicorns, folks.

So, I basically had a 3-prong game plan (more on that shortly) by the time we came to the walk through. While scoping out the master, I noticed a bit of toothpaste green popping through the green-flecked beige wallpaper in the shower area. Hopeful, I slipped my nail under the tear and gave a tentative tug. A good inch of wallpaper came right off, not even leaving the adhesive behind.

Cue maniacal laughter - cut short by Mike's "You can't do that!"

Right. The house wasn't ours yet, so this was mild destruction of property. But the wallpaper deserved it, officer.

Anyway, I was hopeful. Maybe we did have unicorn wallpaper with magical peeling properties. But it was highly likely that this was just a spot that hadn't been glued as well as the rest. Or maybe it was a cold spot or something. I crossed my fingers for a unicorn.
Credit Zazzle

In case you do not have a unicorn on your walls, there are some methods you can use to take down wallpaper. There is no magic bullet. It all depends on what wallpaper was used, if it was prepped properly, and how long it's been on the wall. So, you really don't know what's going to work until you try. Internet, you were not comforting there.

1. Steamer. Basically, you steam the walls to get the paper all good and soggy and then peel it off. Sometimes you still need to scrape with a putty knife, or you can damage the wall if you over soak.

2. Spray the wall with a mixture of hot water and vinegar or hot water and fabric softener. This method may involve getting a wallpaper scorer or peeling off the first layer, because most wallpapers now are water resistant, and the whole issue is neutralizing the adhesive underneath. But scoring can damage your drywall or plaster, so I was hoping not to go this route.

3. Use a DIF spray or gel. Again, you need to score or remove the first layer.

We didn't have a steamer, so I was hoping to try the vinegar and water mixture and that the first layer, if it not all of the paper, would come off. I bought a putty knife to help get stuff up.

On move in day, while answering nature's call in the main floor half bath, I noticed a corner of the wallpaper bubbling up. So, naturally, I pulled it up. It came right off! Holy cow!

But not so fast. The striped panel peeled off because it was paper on paper. Further pulling revealed that it was leaving the adhesive layer completely behind. Womp womp. But now we have a new ritual of taking a tug each time we use the half bath. The adhesive layer is in such great shape I'm tempted to just prime and paint over it, but I'm not sure how well that'll work out. Maybe I'll try a small section and evaluate.

Anyway, the goal was to tackle the master bath first before we fully move into the house. That ... was less victorious. The border in the bathroom pulled right off and left the adhesive layer behind. The shower room on the other hand was a mix of beautiful clean peels down to the wallboard and stubborn shreds and strips that required the Piranha spray I got for Christmas from my mother-in-law (thanks!). To control the drips, I would spray and then spread the gel around with a sponge.


This method seemed to be working. Once the paper was soaked, I'd scrape it up with the putty knife. But timing was tricky - it would dry so fast that you couldn't really spray large areas and hope to get to it all. I also brought up the top layer of the wallboard in some spots. I figure we'll smooth caulk over those nicks and sand it down before priming and painting.

We pulled and scraped in between paint runs in the laundry room. The worst part was actually the border in the tub area. It was not coming off well, even with the gel. Then the other night as I was working on the trim in the laundry room, Mike asks me if I can come upstairs and help him with something.

"Notice anything different?" he said with a big grin.

It took me a moment ... but the border was all down. Apparently I'd married a wallpaper master. Or, as Mike put it, I wasn't using the gel thick enough.

So, we're officially done with de-wallpapering the master bath. Still have the two more bathrooms to tackle, but that's down the road.

Master bath plan:
1. Rip up the carpet
2. Lay down tile floors (Mike's trying to talk me into radiant heat)
3. Paint walls
4. Caulk shower area
5. Paint cabinets
6. Frame in mirror
7. Swap out hardware

Also, while we had friends over, our builder buddy realized that the wall between the tub and the bedroom wasn't original. As in, at one point in time, the bathroom was open to the bedroom. We're glad someone closed it off. Not our cup of tea.